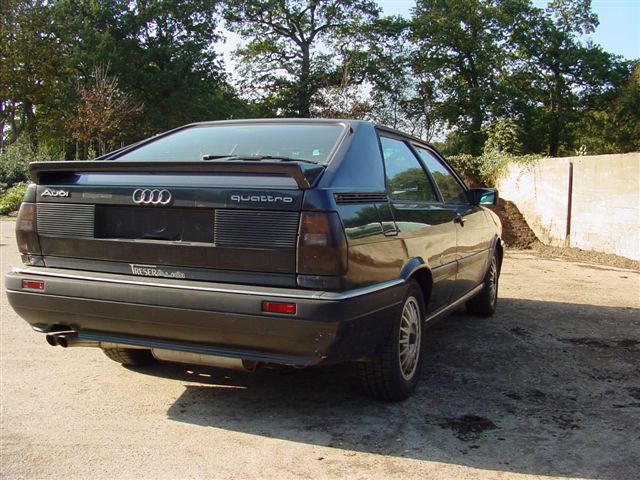
The Coupe Quattro
My CQ
Ongoing Restoration
Gallery
Info / Data
Suppliers
Links
T85q.com
Cambelt and Hydraulic Lifter Change
|
One of the key areas of maintenance on the 5 cylinder engine whether it is turbocharged or normally aspirated is the regular changing of the cambelt every 50000 miles or 3 years whichever is the sooner. If the belt breaks then pistons generally hit valves and then it gets expensive. Prevention is better than cure as the saying goes, I would always use a genuine Audi belt it's worth paying the extra money to get one despite what others may tell you. Whilst you are in there doing the belt then it makes sense to also replace the water pump and seal as well as the idle roller if either of these parts are at all worn. When I changed the cambelt on my car (the Red Coupe Q) it was also necessary to replace the hydraulic tappets (lifters) as well. They had become worn to the point of making some very nasty tapping sounds, this again is a common failing when the engine gets to over 100000 miles. On early URQ's the lifters were adjusted by using shims to compensate for any wear, while on Coupe Quattro non turbos they are self-adjusting, hydraulic tappets. To start with you need to have the correct tools for the job, I recently invested £30.00 gbp in the crankshaft locking tool 2084, which I got from my local dealer. You will also need to have a good selection of sockets, extensions, breaker bar and pipe extension, allen keys, timing light, torque wrench, a range of spanners, Loctite Blue thread lock and a fair deal of patience. Start by removing the grille and trim above the headlights,and the grille below the bumper, next slacken off the power steering pump and move it to one side, and remove the alternator from the car then remove the upper and lower cam covers with a suitable sized allen key ( I have an excellent set of quarter inch square drive bits that are just the job) and 10mm socket or wrench. On the URQ you will have to remove the auxiliary radiator and front bumper. Here comes one of the most crucial parts of the whole operation, we now have to mark the the alignment marks so that we know that the top end is moving in the correct realtion to the bottom end, so on re-assembly pistons do not hit valves. First, remove the spark plugs as it is easier to turn the engine over by hand this way. Remove the oil filler cap and find the TDC mark on the flywheel, look through the window on the bellhousing and turn the engine over by hand until it appears. Get some white paint (Tippex is great for this) and mark the "O" that appears on the flywheel and the pointer as well. Now, look at the back of the cam shaft sprocket, in line with the top of the rocker cover gasket the should be a small punch mark. If there is great mark it with your paint also check that the cam lobes on No1 cylinder are pointing up and that the rotor arm is pointing to No 1 plug lead. If the dot on the cam sprocket is not visible then rotate the 1 turn by hand and it should now be there. As a back up there is also a TDC mark on the bottom pulley and bottom cam belt cover, however this is not the most accurate way to check the timing but it acts a back up. Now before you go any further rotate the engine over twice to make sure all the marks you have made are where they were. Happy??? If not double-check it now. The next step is to loosen the cam sprocket bolt (19mm), I did this by holding the sprocket steady with a big flat bladed screwdriver on the teeth of the sprocket whilst undoing the bolt. At this stage leave the bolt finger tight, next drain the coolant out of the car. There many ways to do this depending on your personal favourite, but a good one is removal of the bottom hose on the radiator. If you are not changing the water pump then you can skip this step if you want, but you will lose some coolant anyway when the pump is undone to slacken the tension on the belt. The next stage is to unbolt the alternator bracket from the side of the engine and unbolt the cage that is bolted to the front panel. Now remove the rubber cushioning piece and replace just the bracket back onto the engine, this will allow the locking tool to lock onto this part. Now with the 2084 tool insert it into the bottom pulley and onto the alternator bracket, it can only fit one way and it is a bit of a fiddle as there is not much room to play with. If you are happy that it is installed correctly now is good time to double check all the timing marks are still where they should be. Now get your ?????mm socket 10 inch extension bar, breaker bar and pipe and undo the bolt in the centre of the pulley, it should be on real tight. A tip here is to support the extension bar that is going into the pulley with an axle stand or trolley jack underneath it. Only undo the bolt at this stage so it is finger tight. Check the timing marks again please. If it helps at this stage draw a diagram of where the belt sits in relation to watre pump and idle roller. Now it is time to loosen the belt do this by loosening the water pump bolts and turning the water pump so that the belt slackens off and pull the belt from the cam pulley. Now remove the 2084 tool and very carefully pull off the bottom pulley, you will note that it can only go back in the same position as there is slot on it and a key for that slot to fit in. I found that I could pry it off gently from the back with a big screwdriver. Once it is off you can then remove the old belt. If you are changing the water pump and idle roller then you will need to first of all put the idle roller in the freezer over night as this aids installation. You need to remove the roller by prising it off or using the special Audi tool and then remove the cam pulley, taking car not to loose the Woodruff key. Then unbolt the back plate and unscrew the water pump, the bolts that hold the pump in place run in an oil gallery and will therefore need to be replaced with new ones with a sealing compound on to prevent leakage. The pump should now come off in your hand. With the new pump I would put some vaseline on the seal to aid sealing and stop it twisting when you are rotating the pump to tension the cambelt later on. Install the new pump and seal and put in the retaining bolts so the pump can be moved by hand and also install the backing plate. Next is to install the new tensioner by pushing it in the recess by hand then tapping the inside area with a drift or socket to make sure it is in place. Do not draw the idler pulley into place with the little bolt that holds it in place, you may shear it off. After this work is completed thread the new cambelt around the bottom pulley and carefully reinstall it onto the cranksahft making sure you do not twist it all and then put the 2084 tool back in place. Place some thread-lock on the threads of the bolt and install it, then with the torque wrench you need to torque it to 330 ft llbs, or if you don't have a torque wrench use the breaker bar and pipe to tighten it. Remove the 2084 tool, chack the timing marks again and then place the new belt around the pump and idle roller. At this stage you are ready to put the cam pulley back on and Woodruff key (half moon shaped peice of metal that goes into a slot on the camshaft) re fitting is the same as removal,. and then put the belt over the pulley, check that the white dot is level with the rocker cover gasket. To tension the belt turn the pump clockwise until the belt can be twisted with thumb and forefinger through 90 degrees on the section between the cam pulley and pump. Happy with the tension? Good, now tighten the water pump. Next very carefully by hand turn the engine over once to feel for any resistance and then do it again making sure that the timing marks are all lined up. Any resistance felt could mean that pistons are hitting valves and something got moved in the earlier procedures. NB it takes two revolutions of the engine to get it back to where it was before. Once you have got to this stage, you need to remove the alternator bracket and re install the rubber bush, put back the alternator / with bracket, belt covers, cage on the front panel, power steering pump and re fill with coolant. Then maybe just once more turn it over by hand and feel for any resistance. Ok put the plugs back in and start up, and slowly refill the coolant as and when needed checking for any leaks. Let's take a step back first to just before you were going to put the cam pulley back on and then the cambelt. It is here where you would then start to embark on the second stage of work. You need to remove the cam cover so things like plug leads, throttle cable, ISV's need to be removed or moved out of the way to make getting the cam cover out easier. After it's removal then you need to undo the camshaft's bearing caps a hhalf turn at a time so avoiding any chance of the cam bending, i would start in the middle and work out. Once all the nuts are off take each cap off noting it's orientation on the cam and from which bearing they came off. Now pull the cam out of it's bearings in the head and try not to disturb the distributor drive otherwise the ignition timing will be out. Now pull out the lifters and replace them with the new ones, replace the cam seal with a new one (lubricate first with engine oil not grease), and then reinstall everything the way it came out, carefully installing the cam bearing caps, if you crack a cap buy a new head!! You will also require a new cam cover seal. It would now be a good idea to check the ignition timing as one final check. It is very easy to get this out of sync, if the car won't start, slacken the distributor off and rotate so that the mark on the lip of the body (cap removed) is in line with the centre of the rotor arm. This is TDC and the car should now run, go back and set the timing with a timing light at between 17 and 19 degrees BTDC. Hopefully by now all is running well, just keep an eye out for coolant leaks. If you have not done this before then do take your time, even if you have to invest in some new tools this one belt change will pay for them, so they will not be bought in vain. Good luck. Acknowledgements: by Iain Atkinson, originally from the urquattro.de website |
Click Here to email me